

French Canelés originally came from Bordeaux in the 18th century and only became popular in the 1980’s- today you can even find Canelés served at the McDonalds in Bordeaux. They are known for their soft chewy inside contrasting with their crisp, caramelized exterior. They taste so good that they are traditionally served plain. In fact, some purists might even say they are not REAL Canelés unless they are served plain, without a sauce.
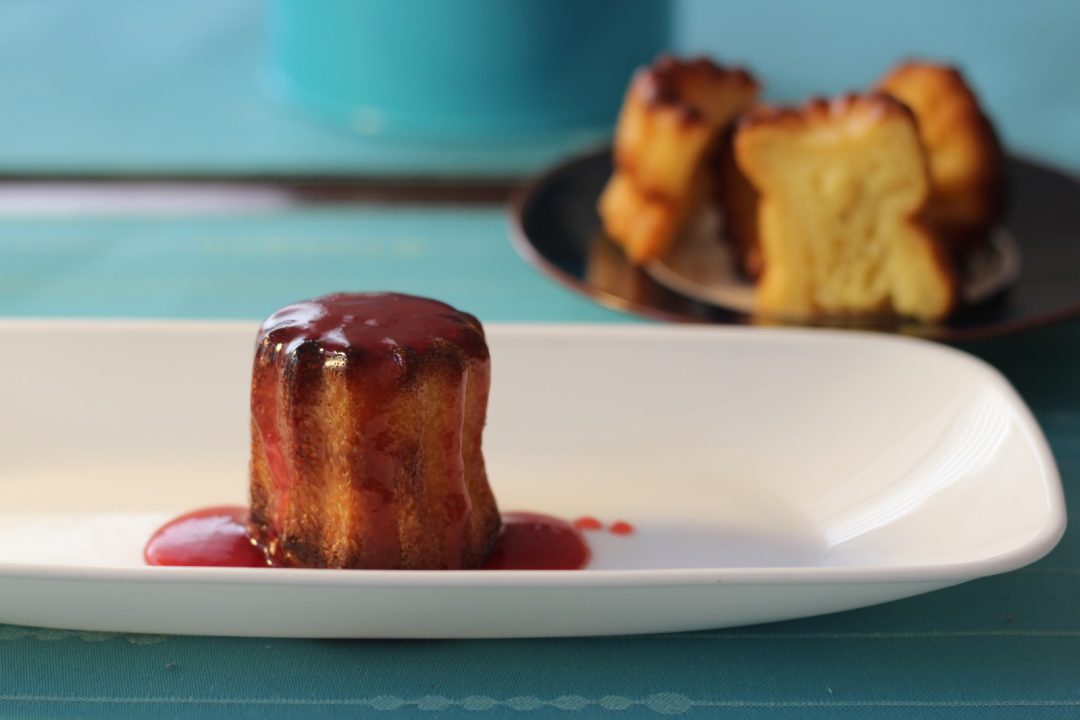
However, I recently drove by a market stall near San Diego selling Blood Oranges, screeched on the brakes (I was attracted to their sign advertising KICK ASS BEEF JERKY) and bought a basket full of Blood Oranges. So, my post morphed into ‘Canelés with Blood Orange and Cardamom Sauce.’
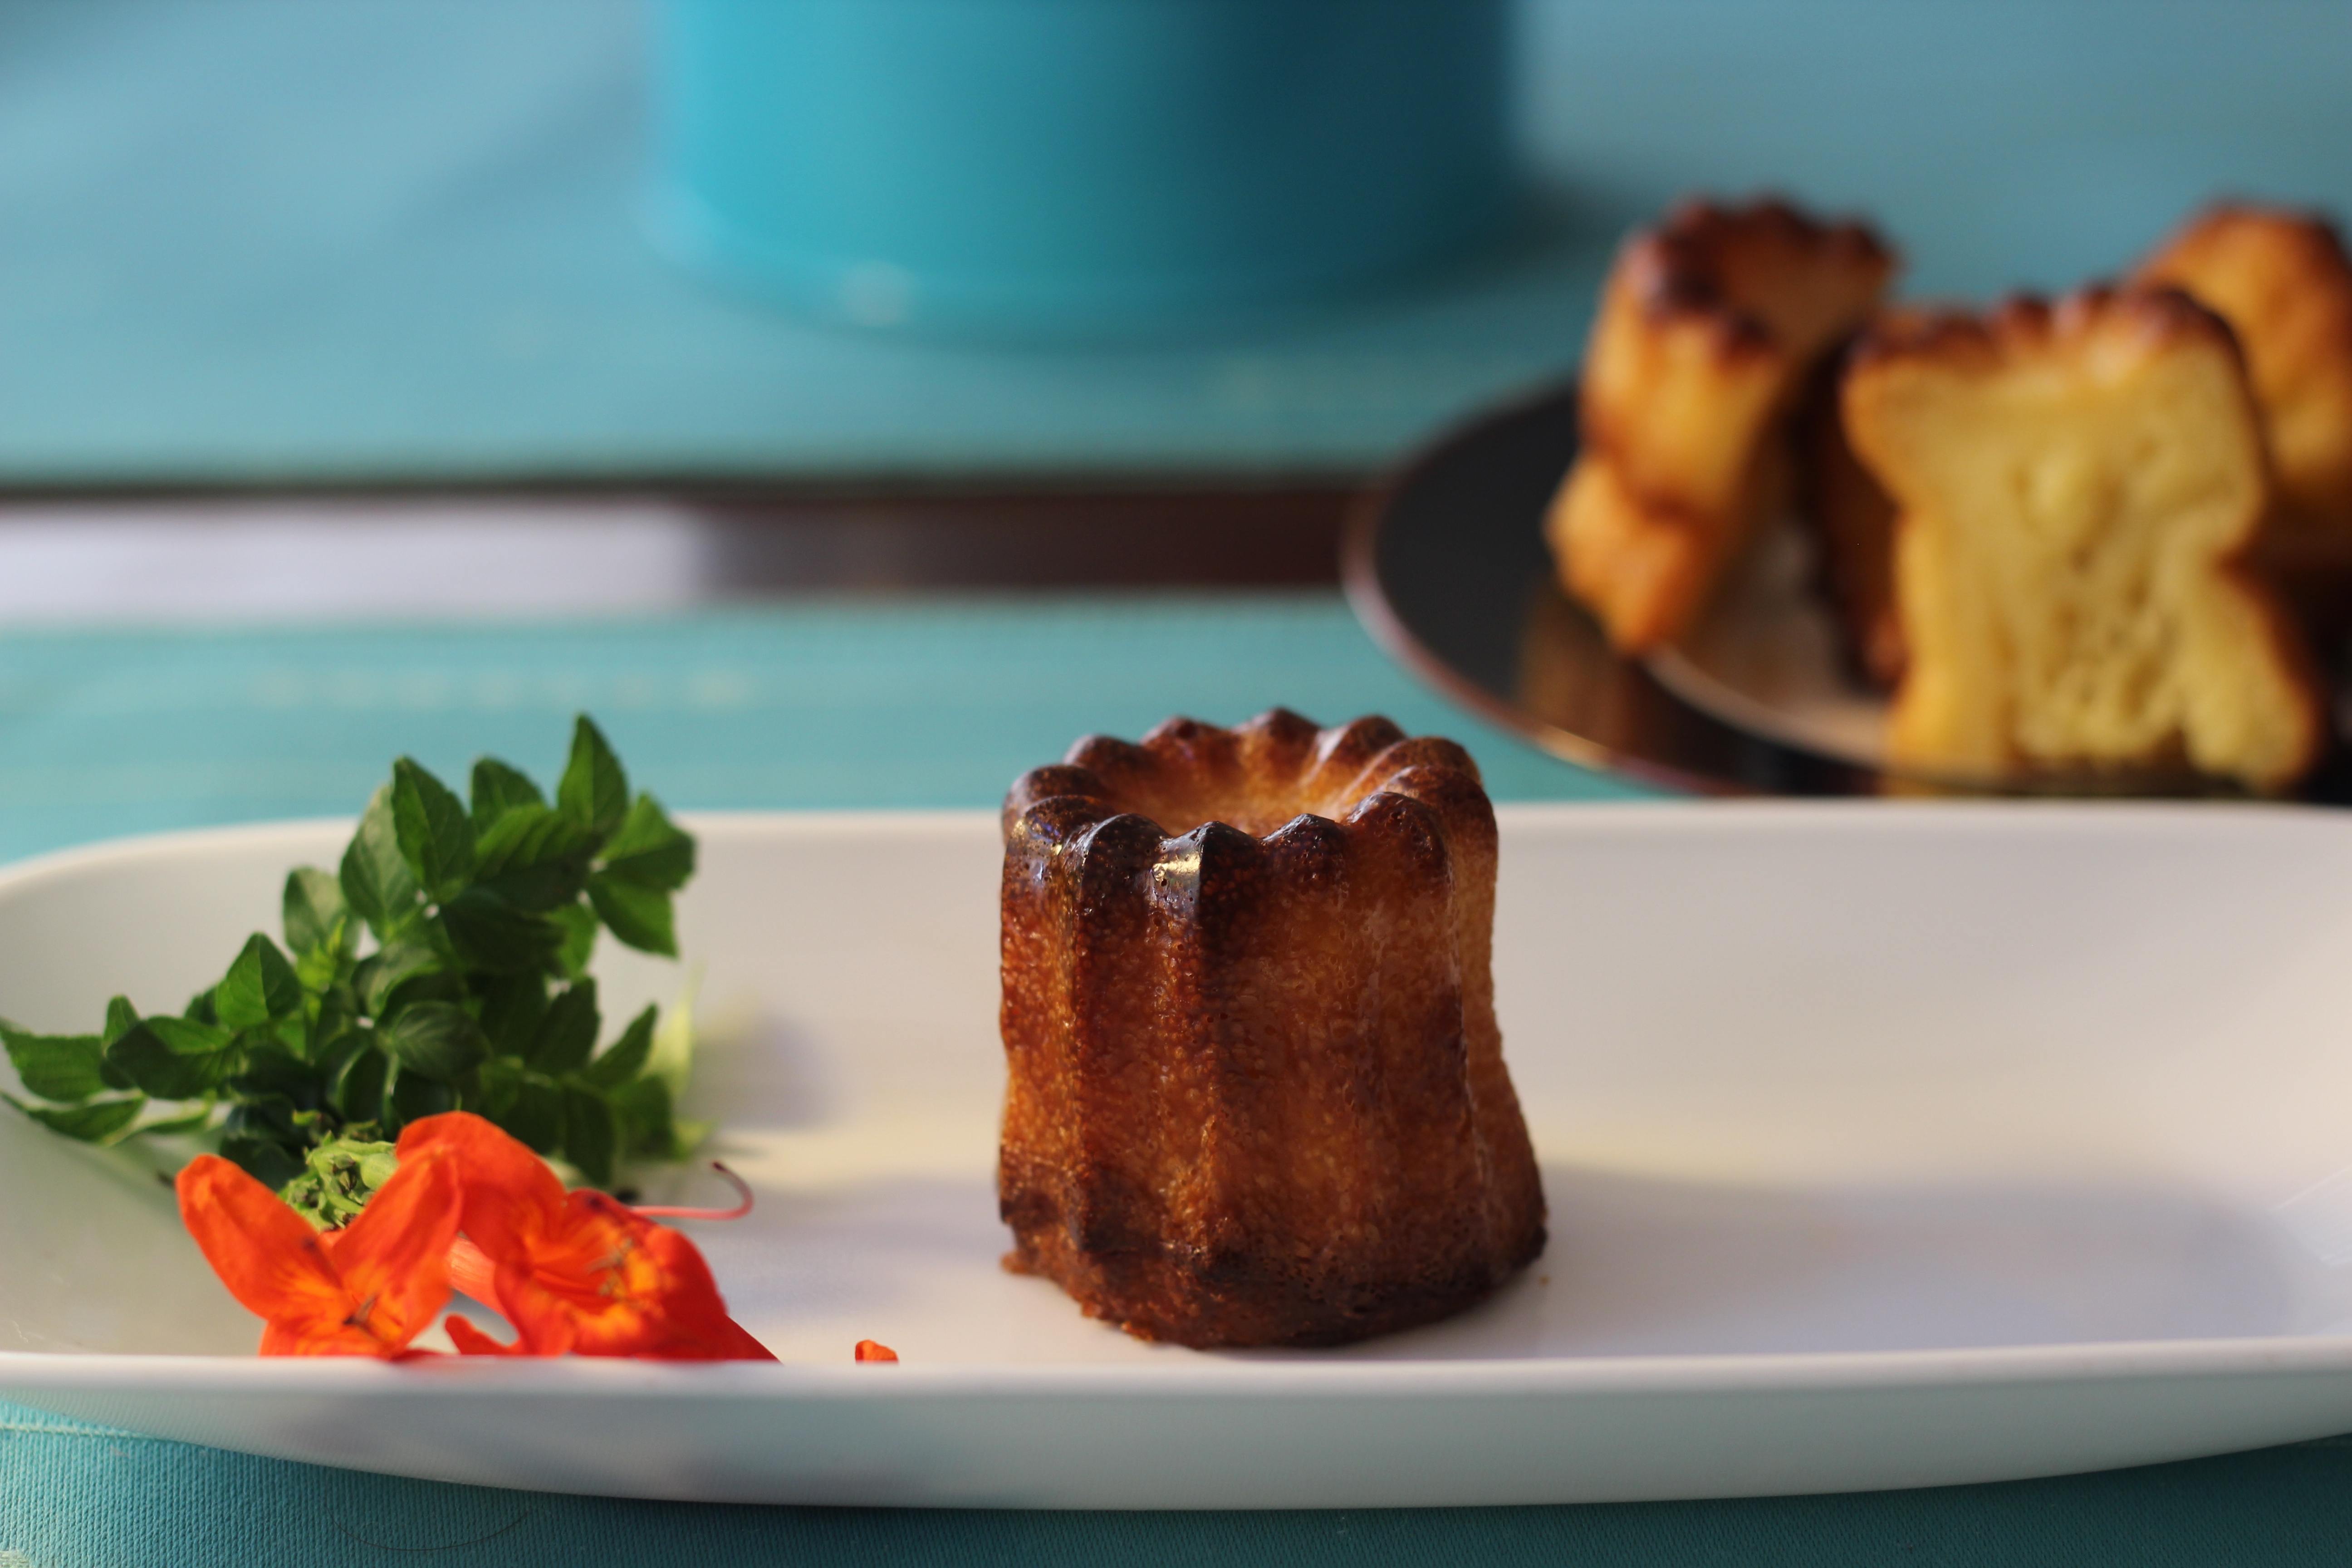
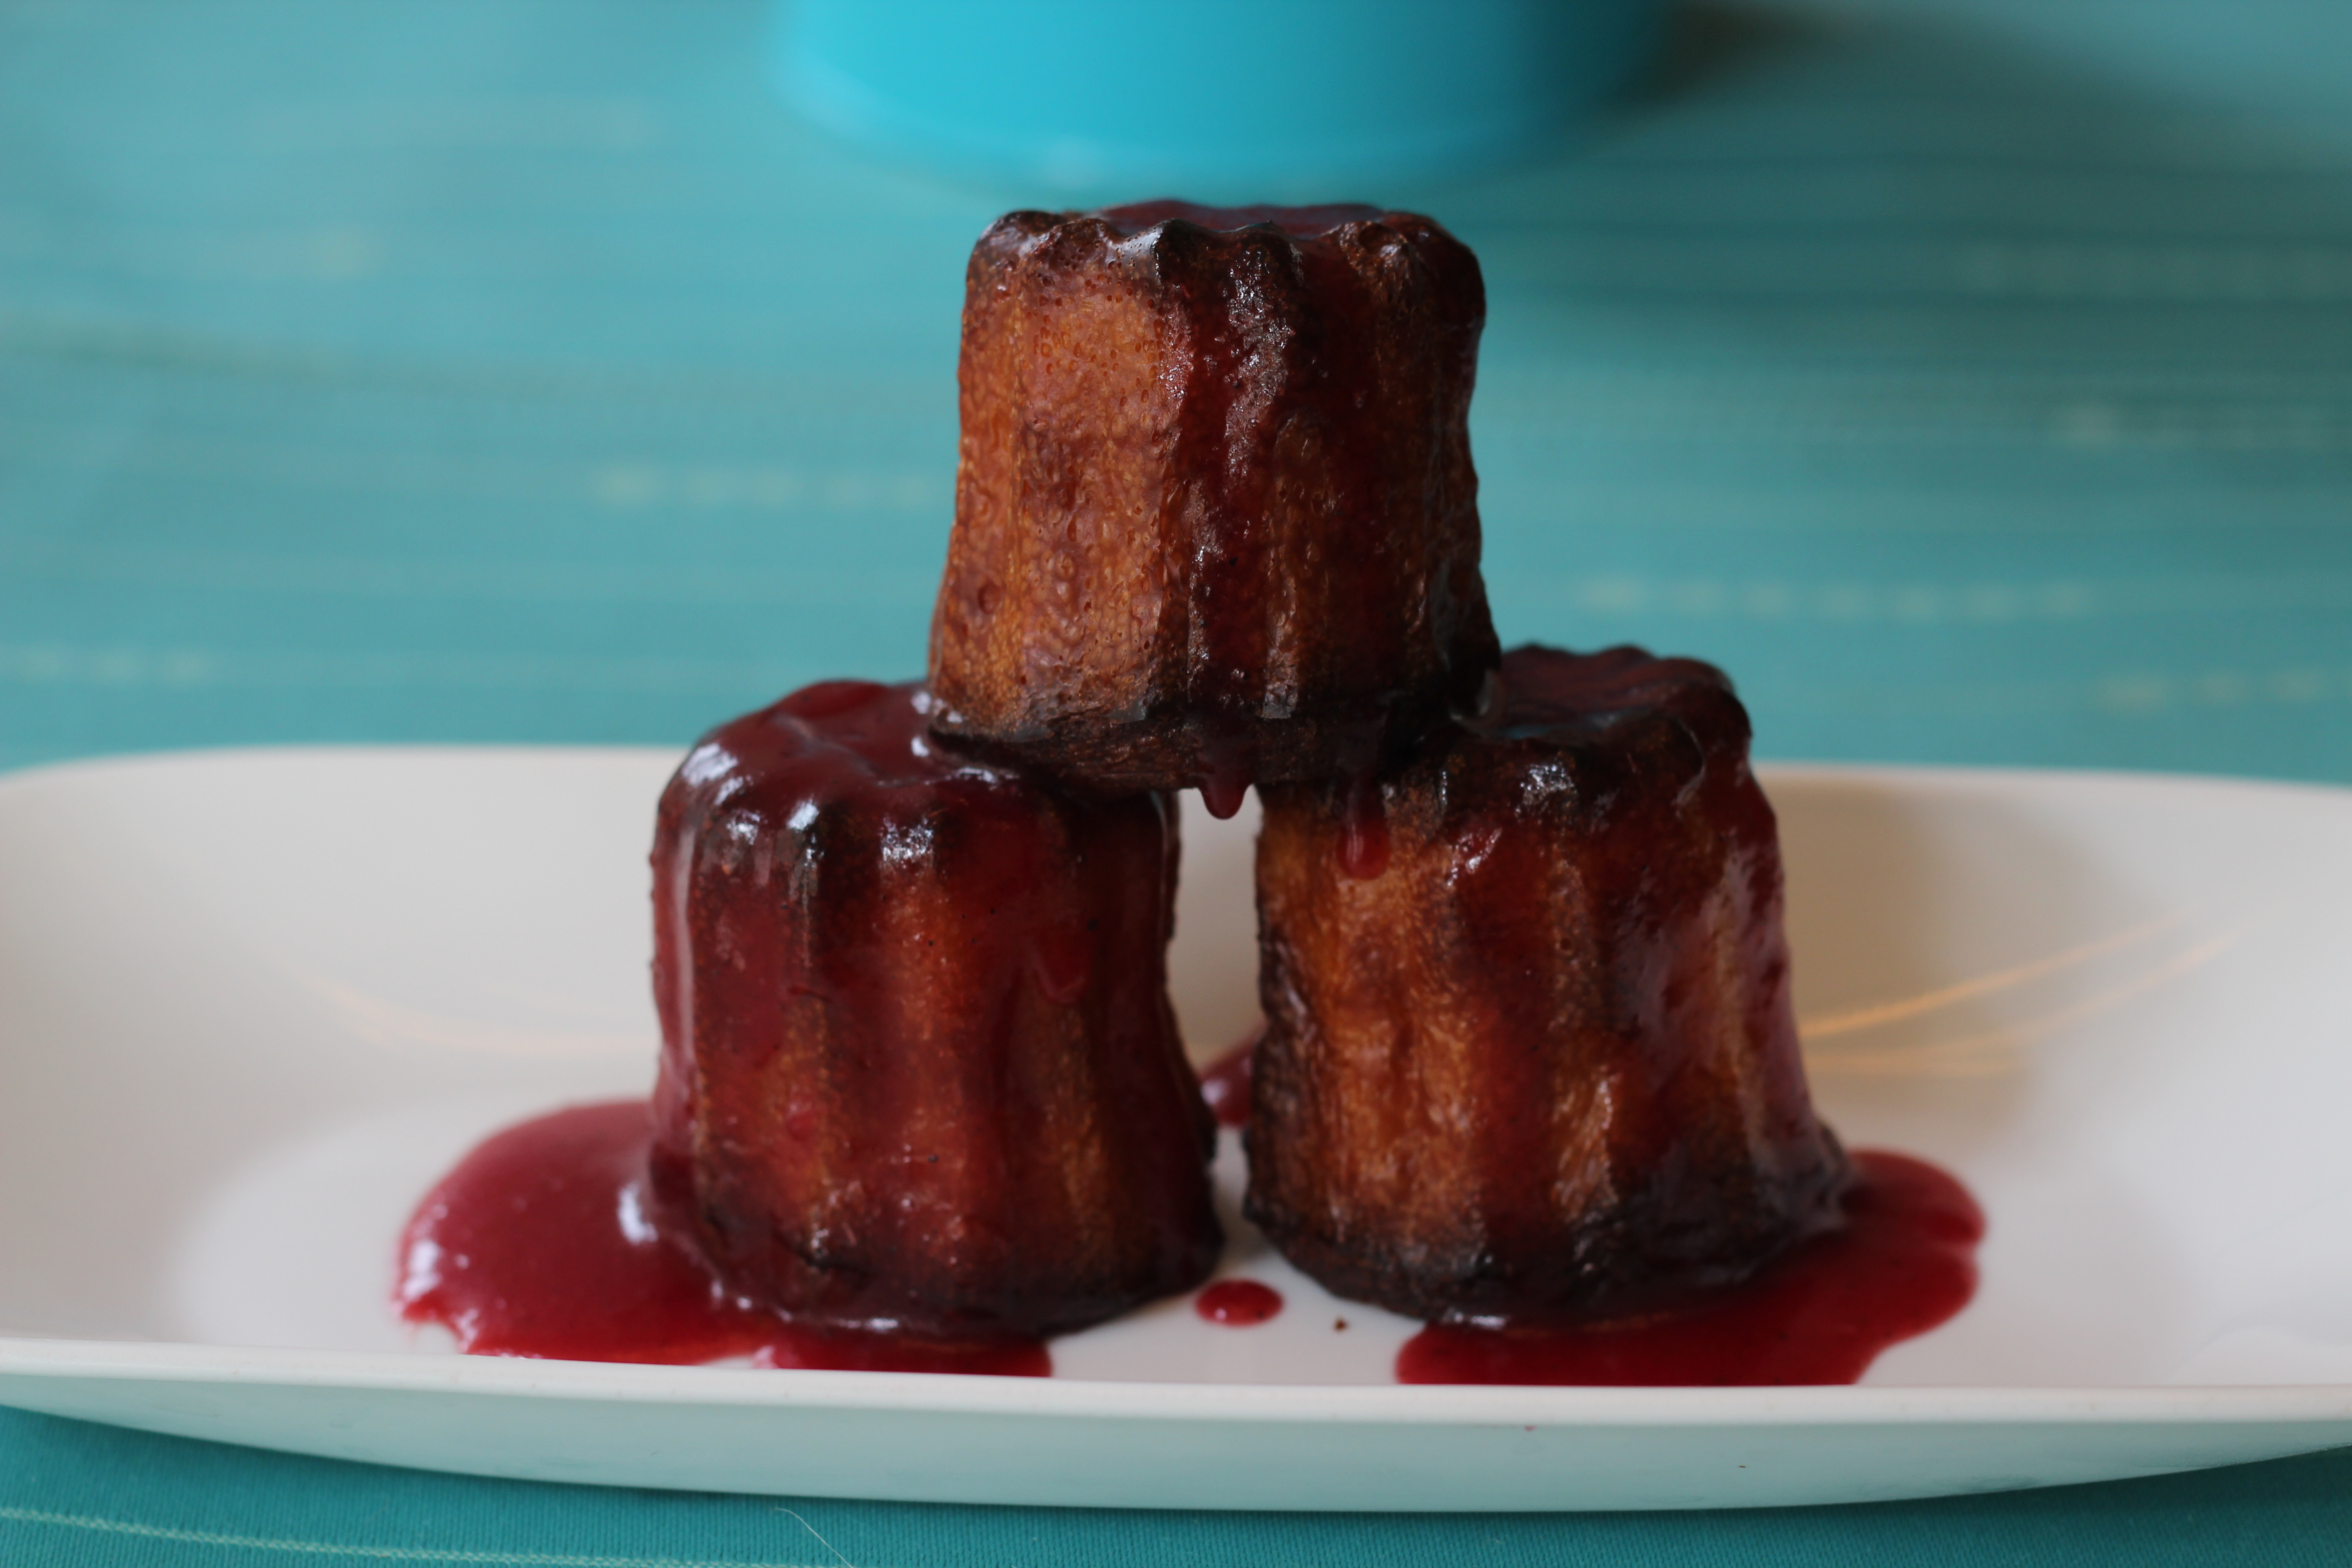
You can serve them plain, as in the photo below (just pick them up with your fingers and pop them in your mouth) or serve with a little sauce for that extra flavour!
Canelés served plain (no sauce):
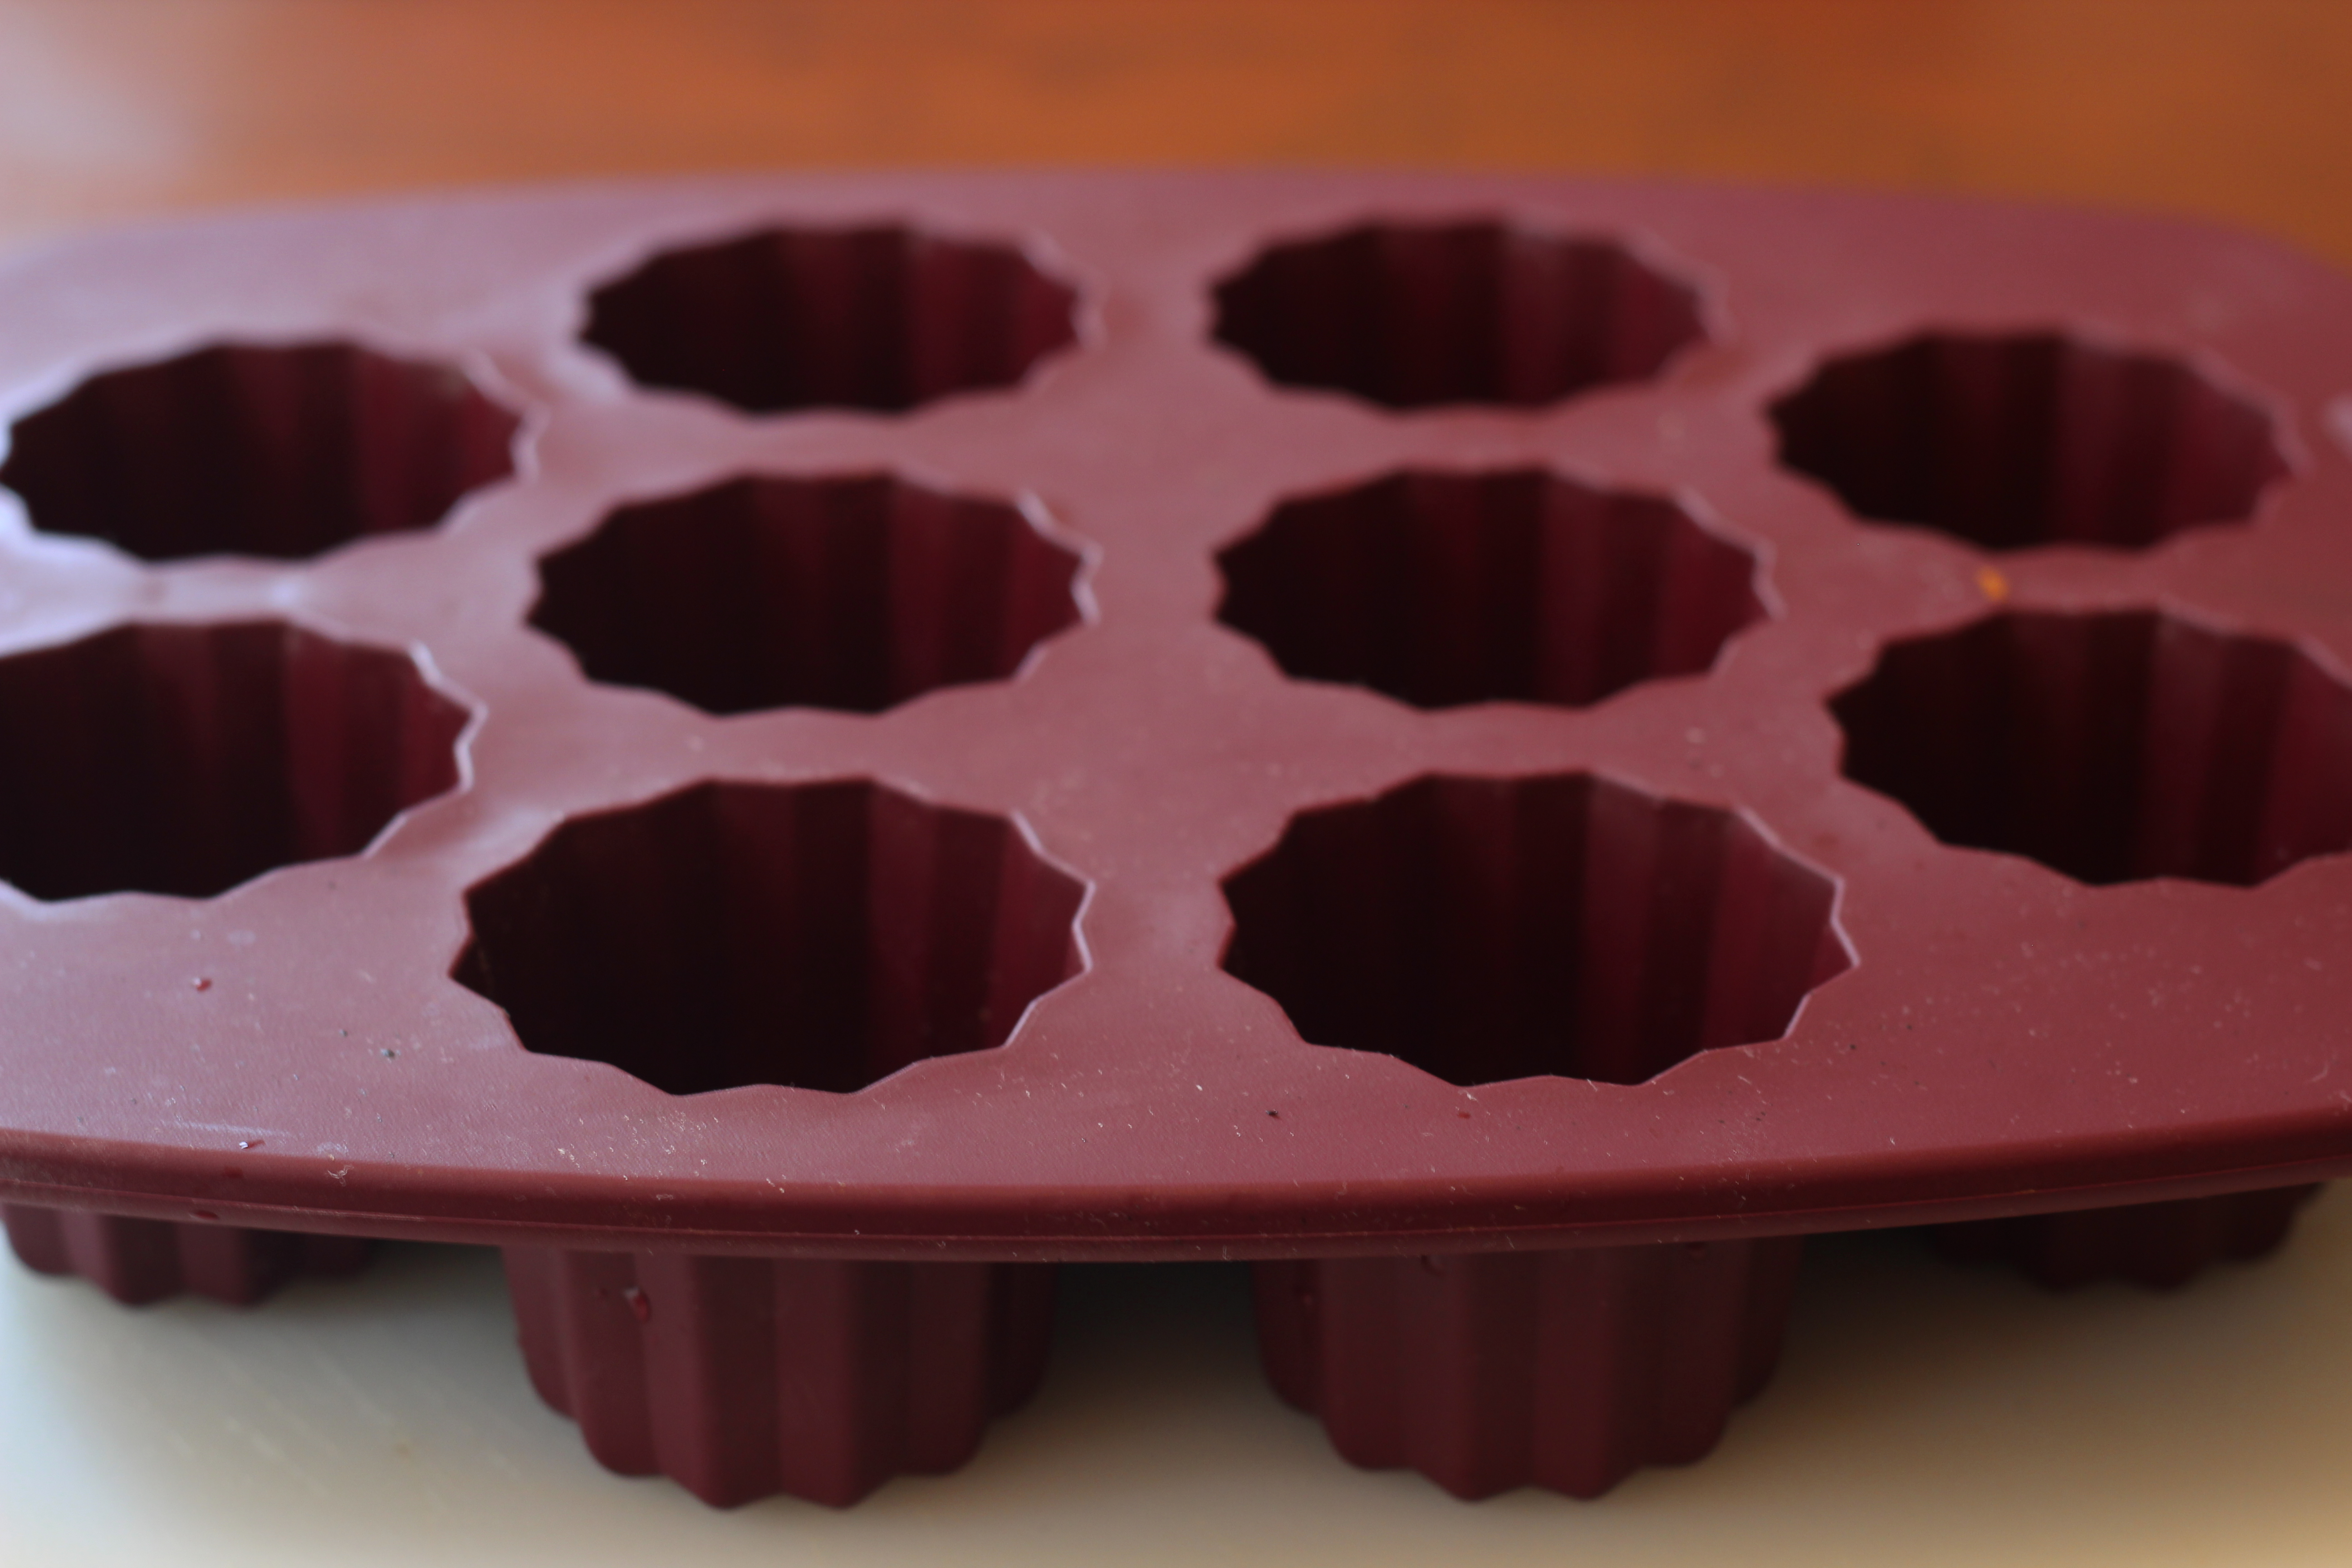
Canelés are baked in a mold that gives them their unique shape with fluted ridges. Some people swear by using the traditional copper molds, which cost about $20 for each individual mold, but being on a budget, I used one of the silicone molds:
Despite their simple form (i.e. no endless layers of cake to frost or fill with cream), Canelés do require a little mothering to prepare, as follows:
- Let the Canelé batter rest in the fridge for at least 24 hours before baking. This allows time for the gluten in the batter to relax and ensures a more uniform texture to the finished product. This might be in my imagination, but it seems like it would also give more time for the rum and vanilla flavors to infuse into the batter.
- Temperature control is very important. To ensure the Canelés have a crisp exterior, place them in the oven at 475 F. (250 C.) for the first 15 minutes, then lower to 375 F. (190 C.) for the remaining 45 minutes. The outside of each pastry should be crisp and brown, but not black.
- The batter should be stirred as much as possible, not whisked. Whisking causes the batter to be aerated, thus producing a fluffy Canelé; we want the texture to be more compact and chewy for the end result.
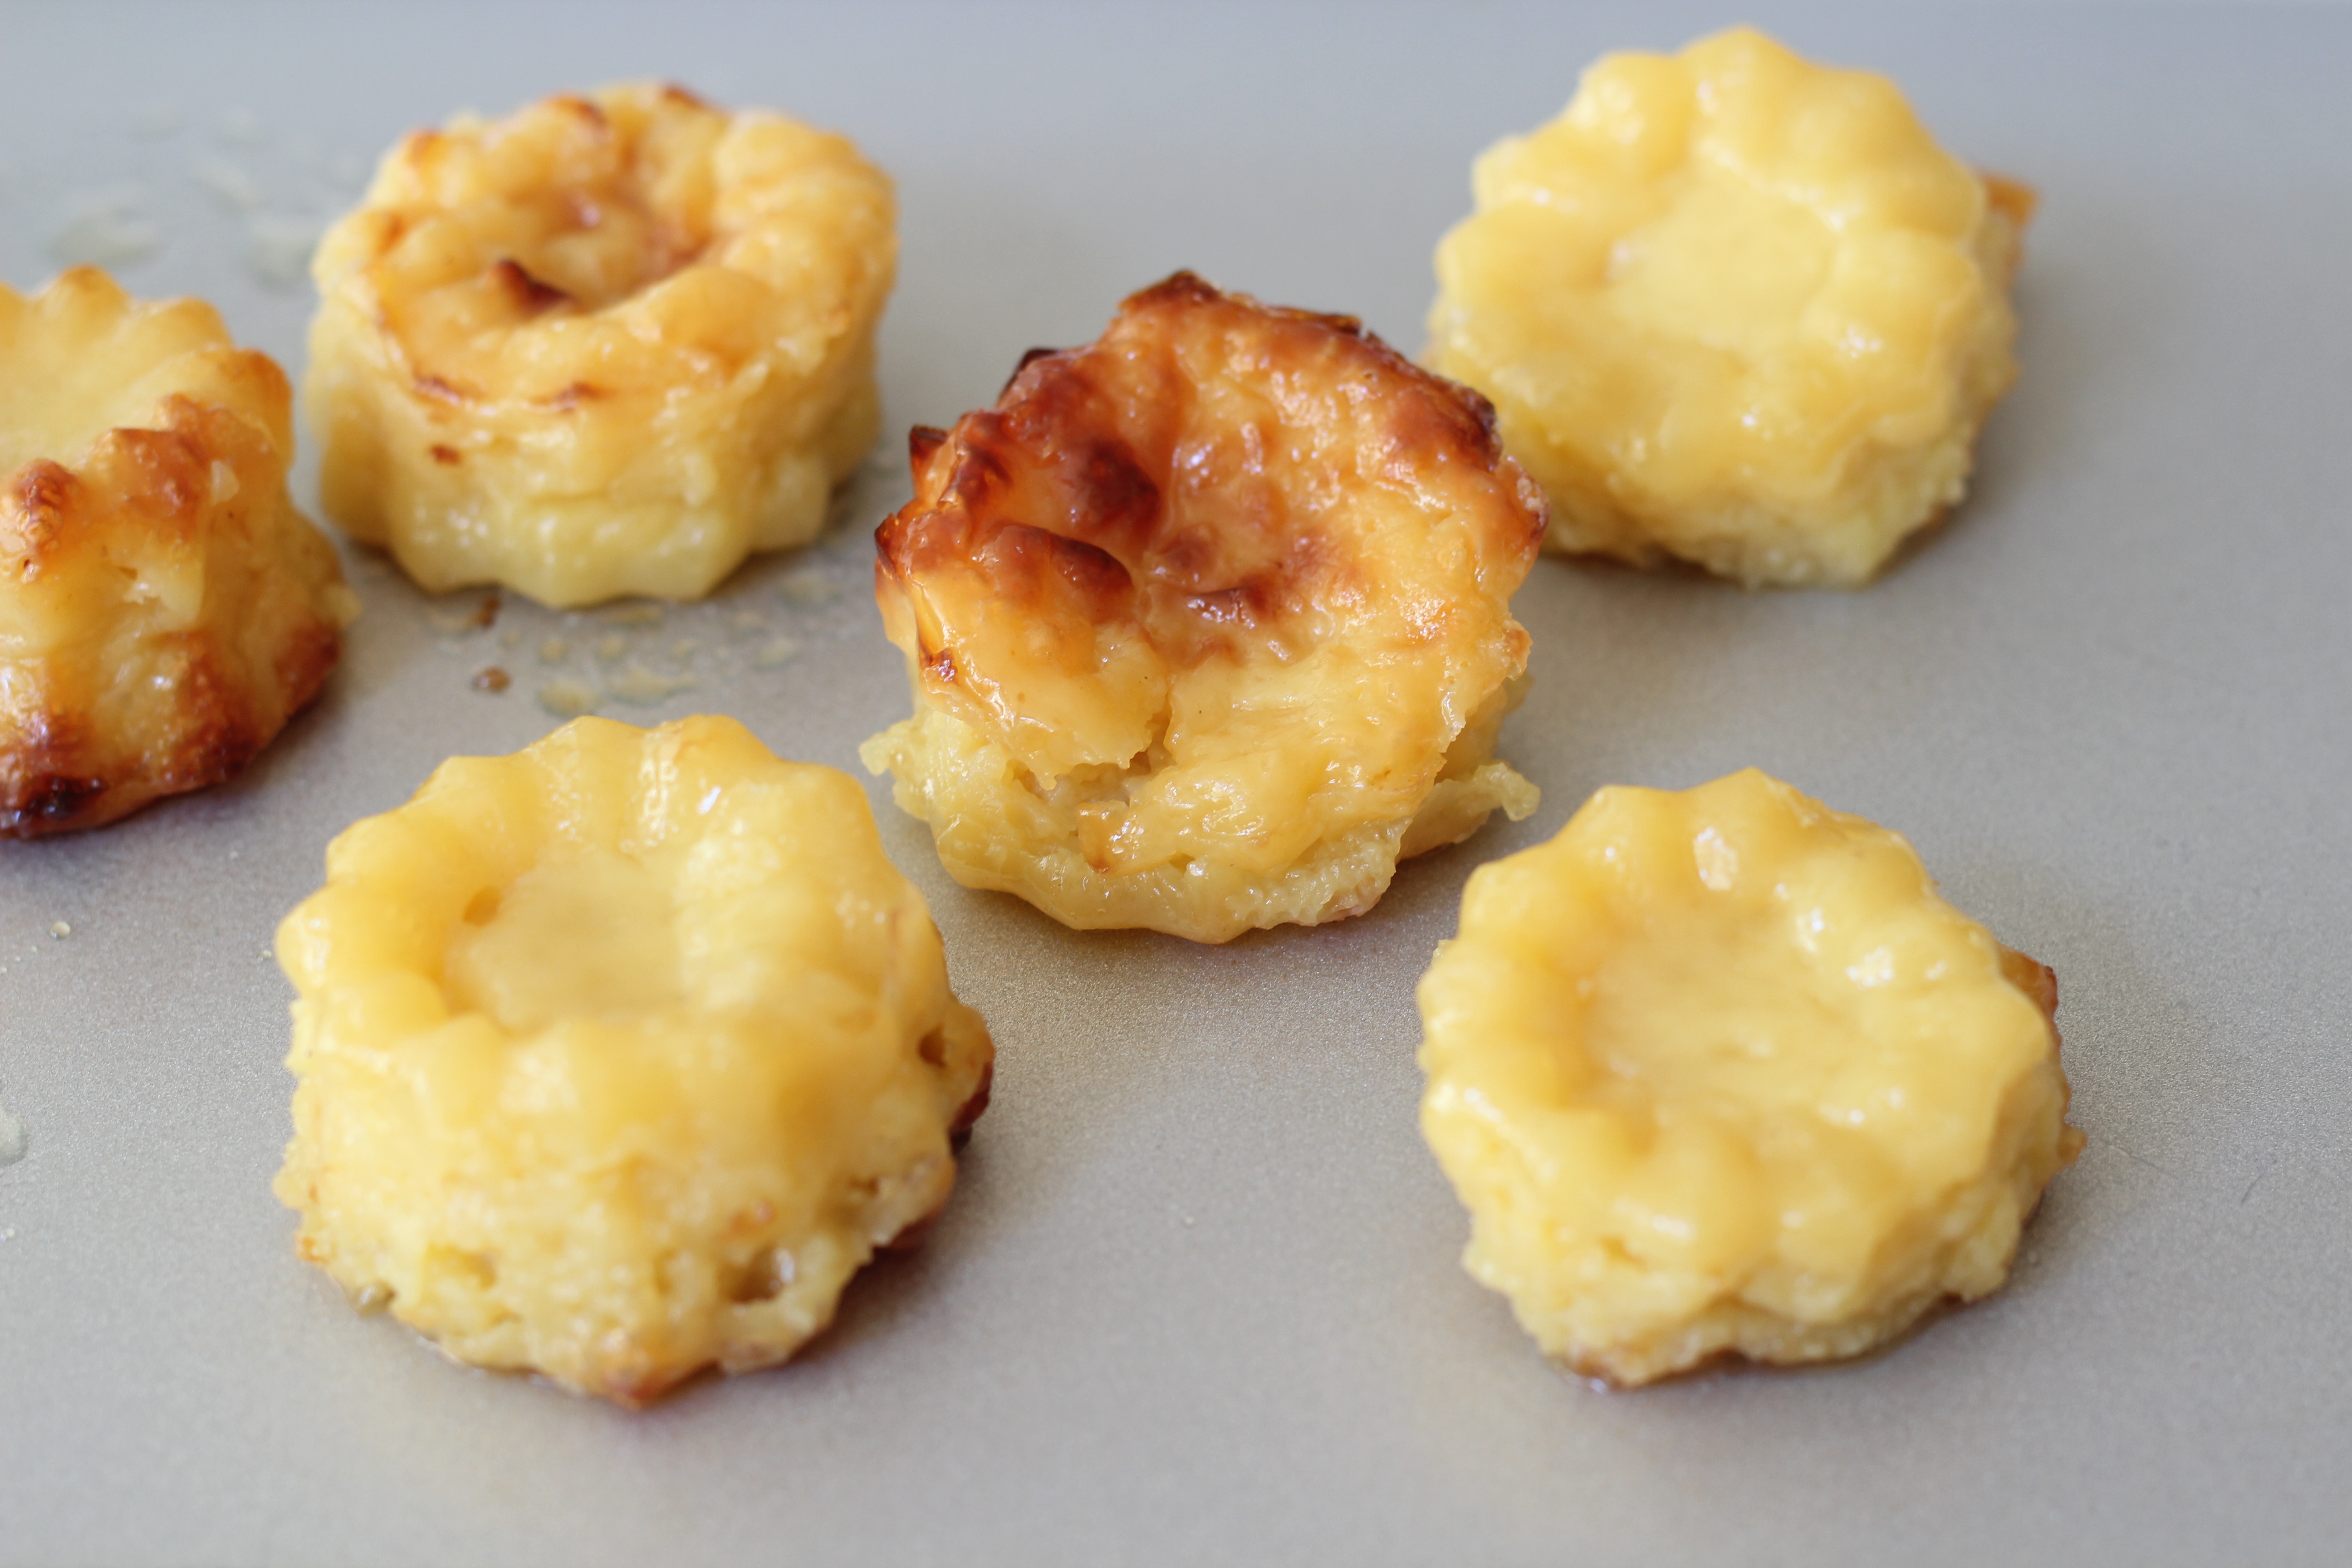
- Don’t be afraid of trial and error- my first batch of Canelés were disastrous, as you can see with my first batch below (they didn’t rise at all and were rather gloopy, but they still tasted good!).
First Failed Batch of Canelés – too ‘gloopy’
- 500 ml (2 cups) whole milk
- 50 g (3 tbsp) butter
- 100 g (~ 3/4 cup) white flour
- 225 g (1 cup) caster sugar
- 1 tsp salt
- 2 large eggs
- 2 large egg yolks
- 85 ml (1/3 cup) dark rum
- 3 tsp vanilla extract
- Pre-heat oven to 475 F (250 C).
- Combine the milk and butter in a saucepan and bring almost to a boil. Remove from heat and let cool until mixture feels lukewarm to the touch.
- In a separate bowl, sift together the flour, sugar and salt. Now add the milk mixture to the dry ingredients; stir but do not whisk.
- In separate bowl, combine the 2 eggs and 2 egg yolks together, then add them to the bowl with the remaining ingredients.
- At this point, there will be some lumps in the batter- pass the mixture through a sieve to remove lumps.
- Add the rum and vanilla extract and stir until smooth.
- Cover the bowl with plastic wrap and place in the fridge for at least 24 hours to rest.
- When you are ready to cook the canales, fill the silicone molds up to the 3/4 level. Place the silicone mold directly on the oven wrack (if possible) and bake for 15 minutes at 475 F (250 C) then reduce heat to 375 F (190 C) for the remaining 45 minutes. The caneles are finished when the outer part is brown and crispy and the inside is soft and ‘custardy.’
- Remove from the oven and let cool. To remove each canele from the mold, push the bottom of each mold upward and release each one separately. Turn over each canale onto a plate and serve plain or top with a delicious orange cardamom sauce (see below).
The Blood Orange Cardamom Sauce
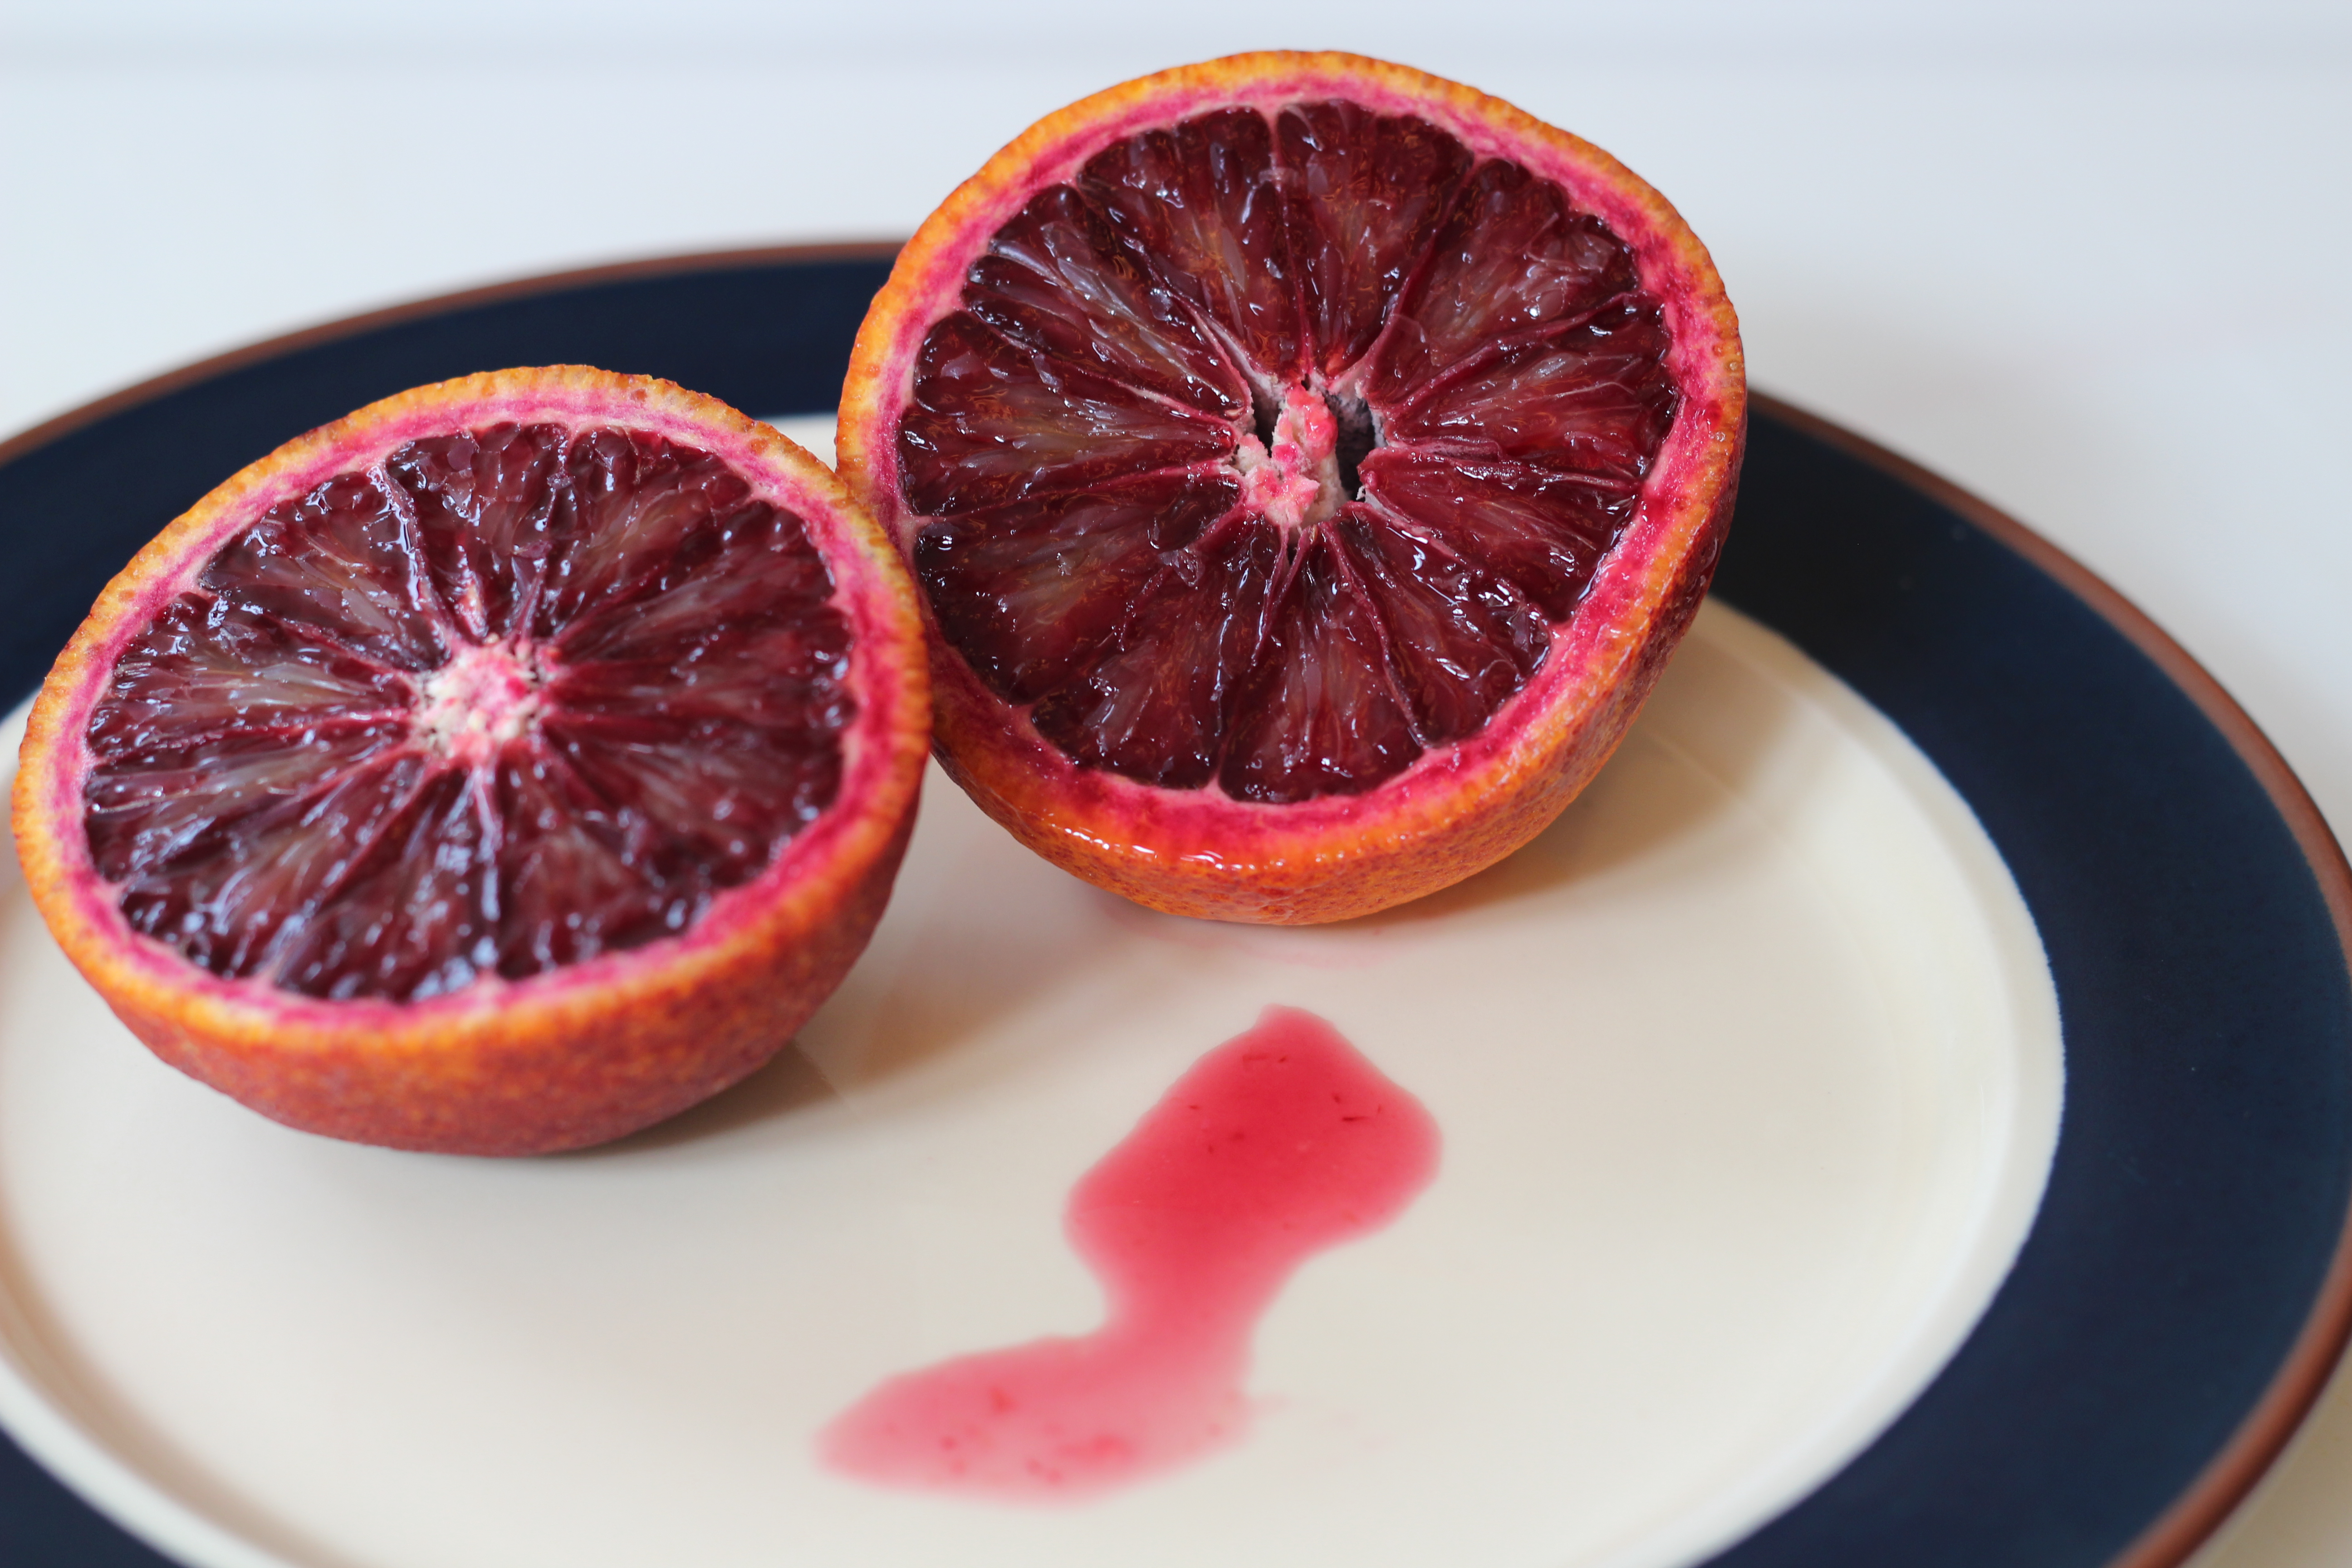
Blood Oranges – Yum!
Ingredients
- 1/2 cup Blood Orange Juice
- 1 tbsp. butter
- 1/4 cup sugar
- 1 tsp cardamom powder
- 1 tbsp. white flour mixed with 2 tbsp. water
Directions
- Heat the juice from the Blood Oranges with the butter over medium heat.
- Add the sugar and cardamom powder and stir.
- In a separate bowl, combine the flour and water to make a paste. Then stir this into the other ingredients over medium heat, to thicken the sauce.
- Spoon over the Canelés or serve separately in a small bowl.


26 Comments
Christina @ The Hungry Australian
August 10, 2013 at 1:02 amThese are on my ‘to bake’ list so thanks for sharing your experience and tips. And I love the blood orange sauce pairing – I die for blood oranges!
Christina @ The Hungry Australian recently posted…Meet the Producers at South Bank’s Regional Flavours Festival, Brisbane
Fran
August 10, 2013 at 4:59 amChristina, I agree about the Blood Oranges- they taste so sweet!
Fran recently posted…French Canalés with Blood Orange Cardamom Sauce
Sandra | Sandra's Easy Cooking
August 11, 2013 at 12:15 amThose look fabulous, Fran! I could just dive in that red sauce!
Have a great weekend and thanks for sharing!
Sandra | Sandra’s Easy Cooking recently posted…Chicken Wings in Honey-Sriracha Sauce
Fran
August 11, 2013 at 11:50 pmMany thanks, Sandra, for your comment.
Fran recently posted…French Canelés with Blood Orange Cardamom Sauce
Amanda
August 11, 2013 at 1:40 pmCopper is all very well for some, but those silicone moulds look way more practical to me, too. I must give these a try, they look delicious, but I think the caramom might be missing from the ingredient list?
Amanda recently posted…The Flavours of Campbelltown Food Trail – A Heavenly Foodie Day Trip
Fran
August 11, 2013 at 11:12 pmThanks, Amanda. I can’t believe I left out one of the main ingredients from the list! I’ve now corrected this.
Fran recently posted…French Canelés with Blood Orange Cardamom Sauce
Lorraine @ Not Quite Nigella
August 11, 2013 at 5:44 pmFantastic job Fran on the caneles!! They’re one of my favourite little cakes-I love that caramelised outer and soft, spongey interior 😀 Adding seasonal blood orange is brilliant 🙂
Fran
August 11, 2013 at 11:14 pmThanks Lorraine. I believe you’re still in Thailand now. I wonder if they serve Canelés anywhere there?
Fran recently posted…French Canelés with Blood Orange Cardamom Sauce
Maureen | Orgasmic Chef
August 11, 2013 at 11:28 pmI’ve had a fail or two with canelés. They aren’t the easiest thing to make well. I’m going to follow your directions and give it a go. 🙂
I like the kick ass jerky idea.
Maureen | Orgasmic Chef recently posted…Going to the Dogs
Fran
August 11, 2013 at 11:49 pmMaureen, can you believe there actually is a brand of beef jerky in the US called ‘Kick Ass Beef Jerky”! I have never seen it anywhere in Australia.
Fran recently posted…French Canelés with Blood Orange Cardamom Sauce
john@kitchenriffs
August 12, 2013 at 3:26 amSo how was the jerky? 😉 Great recipe – love the idea of cardamom in the sauce. I’d definitely go for the silicone molds too – they usually work so well. Good post – thanks.
john@kitchenriffs recently posted…Candied Bacon
Fran
August 12, 2013 at 6:16 amJohn, I didn’t get to try the beef jerky- only the blood oranges. I was attracted to the quirkiness of the sign but decided not to try the jerky.
Fran recently posted…French Canelés with Blood Orange Cardamom Sauce
Smith
August 13, 2013 at 5:56 pmBlood oranges are taste very good. I’ve tasted orange cardomom sauce with French canales in McDonalds. A great delicious treat and I can feel taste still on my mouth!! I’ve never tried to make it out by myself but such instructive instructions quite inspired me to try it out. Thanks for an encouraging demonstration.
Joanne
August 13, 2013 at 9:32 pmCanneles are so cute! And that orange cardamom sauce sounds fabulous.
Joanne recently posted…Gratin with Tomatoes, Eggplant and Chard
GourmetGetaways
August 14, 2013 at 5:04 pmWOW!! I have never seen or heard of these dessert before???
Obviously a trip to Bordeaux is in order 😉
…although I could just follow your direction 😉
GourmetGetaways recently posted…Launch 2013 SBS Feast -Tastings on Hastings
Fran
August 14, 2013 at 10:54 pmHah hah, it would definitely be easier to make them yourself!
Fran recently posted…French Canelés with Blood Orange Cardamom Sauce
Juliana
August 15, 2013 at 8:14 amI never had canelés…yours look nice and tall…the combination of orange and cardamon sounds delicious.
Hope you are having a fabulous week Fran…and thanks for the recipe 😀
Juliana recently posted…Kimchi Rice
Sarah | The Sugar Hit
August 18, 2013 at 9:52 amI adore caneles! I could not get enough of them last time I was in Paris, and I would love to make them at home! Good to know I don’t need the expensive copper moulds.
Sarah | The Sugar Hit recently posted…Mandarin & White Chocolate Popsicles!
Jess
August 25, 2013 at 2:08 pmThese look beyond amazing!! I can’t wait to try them.
Your blog is my current favourite – I get so excited when you post. You should see my fiancé roll his eyes and say “what’s she written now?” every time I excitedly say “we are trying something new tonight!!”
Fran
August 25, 2013 at 11:36 pmThank you, Jess, for your kind comment. I have just bought some copper molds (moulds) to make some more canelés with- I’m curious to see if these molds make a difference- I’m going to post this new ‘experiment’ on my blog.
Fran recently posted…Rustic Deep Dish Peach and Berry Pie
Jean-Pierre
December 28, 2013 at 9:13 pmI am about to try this recipe with silicon molds but I am intrigued there is no conditioning of the molds? No butter, no oil, nothing? Is this an omission or is it not necessary at all with Silicon?
thanks for letting me know before I mess it all up over this detail 🙂
JP
Fran
December 28, 2013 at 10:55 pmThanks Jean-Pierre. No, it’s not necessary to condition the silicon molds before baking. I found that conditioning with some melted butter makes the Canelés bake a bit unevenly. If you find that your first batch of Canelés do not rise at all, try adding a ‘pinch’ of baking powder to the batter. Also, watch your oven; if you find that your Canelés burn, then try reducing your oven to 400 F (200 C) for the first 15 minutes, and then 375 F (190 C) for the remaining 45 minutes. If you want to later try to bake them in copper molds lined with bee’s wax, please refer to my later post. Good luck!
Fran recently posted…Tea-Smoked Duck Breast Salad with Mango
Dee Kistner-Kaufman
February 13, 2014 at 10:03 amI am determined to learn to make caneles really well. (We’ll see how that goes!)
I have both the silicone AND twelve of the copper. So far, in my experience, I must say the copper gets the better exterior, while the silicone does an adequate job on
all the rest. But here is why I am writing, in the instructions you have on Point 5
“At this point, there will be some lumps in the batter – pass through a sieve to remove lumps.” Having a ridiculously small kitchen, no dishwasher, and low water pressure, I am always looking for ways to use fewer things … like an extra bowl and strainer.
Jacques Pepin in his book ‘Chez Jacques’ says: “In another bowl large enough to hold the finished batter, combine 1/2 of A/P flour with 2/3 cup of sugar. Pour about
1/3 of the milk mixture into the flour-sugar mixture, and mix well with a whisk.
(The goal is to make a thick mixture that becomes very smooth as the whisk threads go through it. If all the liquid is added at once, the batter will be lumpy and require straining.) Add the rest of the liquid to this thick mixture, and mix it in: there is no danger of it becoming lumpy at this point. Cover, and refrigerate overnight.” I’ve done your recipe this way and voila! no lumps and no straining!!
Thought you would like to know. Thanks for a great recipe! And love your website!
Fran
February 13, 2014 at 12:17 pmDee, thanks for your comment. I’m glad that Jacques’ technique worked for you: of gradually whisking in the sugar/four mixture with the milk mixture in order to avoid lumps. I try to avoid a lot of whisking in order to avoid making the caneles too ‘fluffy.’ However, I’ll have to try your technique sometime. I also highly recommend that you try baking caneles in copper molds lined with bee’s wax and butter. This produces a superior crispy exterior. Please refer to my post “Baking Caneles in Copper Molds: the Experiment.”
Dee Kistner-Kaufman
February 14, 2014 at 12:08 amIn this case the whisk was used, not so much to ‘whisk’ in the
‘let’s make fluffy egg whites’ sense, but to use as one would
a wooden spoon to gently mix things in but very thoroughly
because of the many wires cutting through the batter.
You are not getting air into the mixture. I think the key word
is ‘mix’ as opposed to ‘beat’ or ‘whisk’. Try it and see what
you think. Best, Dee
Natalie Jean Sanders
April 15, 2014 at 8:14 pmI’ve never even heard of these, and I’m enjoying discovering new things while following your blog posts
Natalie Jean Sanders recently posted…Simplex Copper Tea kettle: The Perfect Partner For Tea Fans